Last Updated on May 27, 2022
Bouncing on the trampoline gives great fun and workouts for the whole family. Nowadays, you will find this equipment in almost every backyard. If you just received a new trampoline package, your kids won’t delay a bit to jump therein. So, you have to install the trampoline shortly.
Maybe you already know how to put together a trampoline. If you aren’t, you have to learn it first to do trampoline setup safely. And we recommend you know the process before getting the trampoline in hand.
Well, we’ll cover the topic in detail, so be relaxed and learn the exact ways. This article also helps skilled ones as they can recap the process in a minute. Let’s begin!
How to Put Together A Trampoline Like A Pro
Step 1: Choose A Good Location for Trampoline Assembly
 In the very beginning, you have to choose a suitable position to install the trampoline. If it is large enough, find out a good place that can accommodate your trampoline.
If you plan to install the trampoline in the backyard, make sure there is no large tree branch over there. Also, level the ground and cut the large weeds, scrubs, and tree branches from there.
For safety purposes, avoid high wind areas, as strong winds may uproot the trampoline. And most importantly, be sure there is ample space around the trampoline. The recommended minimum clearance is 1.5 m on all sides and the height clearance should be more than 6 m from the ground.
Step 2: Layout All Parts and Check Them Before Trampoline Setup
Before starting trampoline assembly, unbox the trampoline package and check whether all the parts and accessories are included in the box or not. To do that, you can cross-mass the received parts with the trampoline manual.
If there is any faulty or missing part contact the manufacturer for quick replacement. Besides, you can classify all the similar parts in one category for easy findings.
Most trampolines come in 3 to 5 boxes having several parts and accessories such as-
- Trampoline frame, legs, T-sockets
- Poles for enclosure attachment
- Enclosure net
- Spring pad
- Anchoring kit and strings
Moreover, a few trampoline brands provide many more like a ladder, basketball hoop, and some other additional accessories with their trampoline packages. You can also buy them separately.
In this inspection step, check all the parts come with the right dimension. And the assembly manual is the most important thing that will help you greatly in the trampoline setup process. After confirming all trampoline parts are available and healthy enough, go for a further process.
Step 3: Tools Required in Trampoline Assembly
You need the right tools to put together the trampoline completely. Luckily, the majority of popular trampolines i.e. adult ones come with trampoline assembly tools. However, if you haven’t got or lost them, you can buy them separately. These tools will help you in proper trampoline assembly.
The necessary tools for trampoline installations are-
- Spring puller tool or hook
- Phillips head Screwdriver
- Rubber mallets
- Power drill
- Wrench set
- Protective gloves
A spring puller tool or spring tool alternative is used to pull and attach the springs. You can also use a spring rather than a spring puller for spring pulling. Phillips head and wrench set help in screw tightening. The power drill can make the assembly process faster. A rubber mallet is used to set the springs in the right position. And hand gloves protect the hand from hand injuries.
Step 4: Reading Trampoline Installation Manual is Important
After confirming, you have all the trampoline parts and necessary tools in hand, it’s time to read the trampoline installation instruction. Most assembly manuals will represent visually how to assemble a trampoline step by step. Some trampoline setup processes have a bit twist. However, by reading the manufacturer’s guidelines, you can understand the installation process easily.
Step 5: Put Together Trampoline Legs and Frame
The frame is the heaviest part of a trampoline. The first step of frame assembly is joining the frame with T-sockets. The T-joints will help to connect the frame with the legs. Then push one piece into another to complete the circle or rectangle shape of the ring. Doing this, you can see the first visible portion of the trampoline.
At this stage, you have to attach the legs to the frame. There are spots on rings for attaching all the legs. Connect each leg with a previously joined T-section of the ring. Now, position the legs and rings rightly so that the holes are lined up. If necessary, use the rubber mallet to do that.
Then, fix the legs and T-sockets using provided screws/bolts. The Phillips head screwdriver, wrench, or electric drill will help you in this regard. If you need faster assembly, use the drill. So, the frame construction is ready for further parts to add with it.
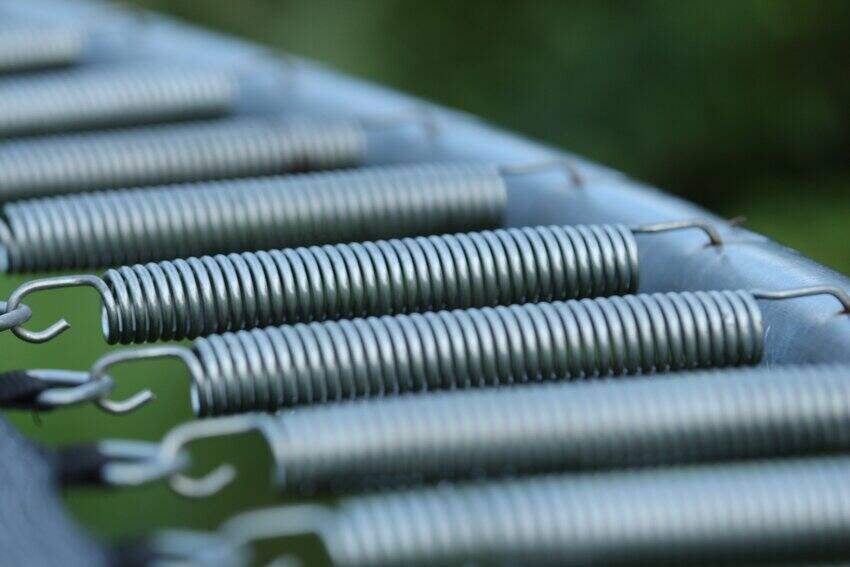
Step 6: Assembling Trampoline Springs and Mat
Have you wondered how to put a trampoline mat or how to put springs on a trampoline frame? Don’t worry, following the instructions below, you can easily do the job done.
The trampoline springs have two distinct ends such as open-end and closed-end. The closed-end is attached to the V-rings of the trampoline mat and the open-end is clung with the frame. The first four spring’s attachment is crucial.
Well, start attaching the earliest spring. Attach its closed-end with frame and open-end with the mat. A spring puller is a good tool to pull and extend the spring to set it up in the right position. Rubble mallet also helps to hit and snap the spring in the right place.
After completion, the first spring attachment now joins another spring just straight and opposite to the first one. Then add another two springs to a 90-degrees angle of the first two springs.
When the four spring’s assembly is done, the mat is visible on the frame. Now join other springs like the earlier four or one by one until you complete all springs attachment with mat and frame.
Step 7: Installing Safety Pad of Trampoline
The trampoline spring cover is made from soft material and used for safety purposes. It protects jumpers from the direct hit of springs and frames. In spring cover, there are several straps or Velcro that help to fasten the spring cover with frame.
Step 8: Adding Poles and Safety Net
Trampoline poles are vertical posts to support the enclosure net. The poles should go to the frame holes or they might be joined with legs using screws or other joints. Poles are covered with soft foam or pads to protect jumpers from the direct impact of the poles.
When poles attachment is done, go for the good threading net with poles. Secure the enclosure net with frame in its top using the bungee ropes. Also, tie the net bottom with the frame. Now your trampoline gets a real safety enclosing.
When attaching the full enclosure, consider the position of the zipper door. Place the net door rightly so that you can easily enter and exit the trampoline.
Step 9: Securing Trampoline with Anchor Kit
Although the trampoline is almost ready to jump still we recommend attaching the anchor kits for trampoline safety. Many trampoline packages come with these kinds of wind stakes or anchor kits.
Anchoring the trampoline using wind stakes, you can easily prevent the trampoline from blowing away. There are several types of trampoline anchor kits. Just insert them in the ground and fasten with your trampoline legs.
Step 10: Installing Ladder and Additional Accessories
To climb up in the trampoline jump bed, you need to add a 3 to 4 steps DIY trampoline ladder. Also, secure it with hooks to prevent displacement. If you like more trampoline accessories like a trampoline basketball hoop, trampoline tent, and water splash also install them.
Step 11: Do Final Checkup Before Jumping
So, you do the trampoline setup done however we recommend reviewing all the processes again so that there is no safety glitch. Before allowing kids to jump there, inspect all the screws, joints, springs attachment, and others. If you feel, the trampoline is now safe and sound for kids, allow them to jump.
Frequently Asked Questions on How to Put Together a Trampoline
What are the common trampoline assembly problems?
Being the first-timer, several silly and common trampoline assembly mistakes and problems might have occurred. Some of them are-
- If you don’t maintain the right pattern in spring attachment, this might create a problem after completing halfway spring attachment. To avoid this, attach 4 to 8 springs in the above-mentioned pattern first and then go for others.
- Tightening all the legs and frame springs is important. Otherwise, it may create accidents in jumping. So, tight all the loose springs.
- It may be difficult to assemble a trampoline that is measured as a large alone. If you can’t handle it alone, don’t hesitate to take other’s help. And if you aren’t confident, hire a handyman to install the trampoline rightly.
- Another trampoline assembly error may occur due to going trampoline assembly without reading the manual thoroughly. Don’t do that, read the trampoline setup instruction before installing your trampoline.
How much does it take to set up a trampoline?
The spring-based trampolines can be put together within 2 to 4 hours depending on their size and shape. But you can install the spring-less trampolines between 1.5 to 3 hours. On the other hand, the sunken trampoline needs almost 4 to 5 hours in its full installation.
How to install an in-ground trampoline?
In-ground trampoline assembly is more complicated than the usual trampoline installation process. By the way, the main steps of in-ground or sunken trampolines assembly are-
- Digging big size hole according to trampoline size
- Building retaining wall to hold the trampoline rigidly
- Drain making for proper water passing
- Assembling springs, mat, and frame
- Site trampoline into the prepared hole
- Attach vented pads and enjoy
How much does it cost to put together a trampoline by assembly service?
Trampoline assembly cost depends on several factors like trampoline size, shape, and the area where you are living in. Most professional trampoline assembly services charge $100 to $300. But the sunken or in-ground trampoline complete assembly is more expensive than the above-ground trampoline.
What type of trampoline safety you should maintain in trampoline installation?
While assembling the trampoline, you should follow the safety guidelines. Being unconscious, you may get hurt. Several trampoline assembly safety is-
- Don’t allow kids while trampoline installation is running
- Wear gloves to prevent hands poking from sharp metal parts
- Apply standard pressure in the spring assembly
- Don’t put sharp tools and accessories on the mat, pad, or net
Conclusion on Trampoline Setup/Assembly
Either you purchase a new trampoline, want to reinstall it after winter, or any other reasons when trampoline installation is necessary our in-depth guideline will be helpful to do that. As a DIY enthusiast or homeowner, you should know the right way on how to put together a trampoline safely so that you can do it in need of essence.
And you should also know the trampoline care and maintenance, how to move it, disassemble process, clean trampoline, and other basic things related to the trampoline.
Installing a trampoline properly, you can create a good fun and exercise zone for the whole family. So, do it carefully following the above-mentioned trampoline assembly guidelines. And jump there to get endless fun and exercise.

Noah is a family guy who loves to hang out with friends and family whenever he finds some time and space. Enjoying a trampoline time is one of his favorites form of recreation. Life is beautiful for Noah!